
Welcome back to The Tastebud, In this issue we're getting Back to Basics, but in the most delicious way possible. Ever wondered how chefs whip up those mouthwatering dishes that leave you craving for more? Well, it’s all about mastering a few key skills. In this edition, we’re unpacking five must-know culinary techniques that will elevate your cooking from everyday to extraordinary. From creating the perfect aioli to the art of blanching veggies, pickling like a pro, stirring up a smooth roux, and crafting flavor-packed marinades, we’ve got you covered. So, grab your aprons and let's dive into these fun and flavorful cooking skills together.
Skill #1: Making a Killer Roux
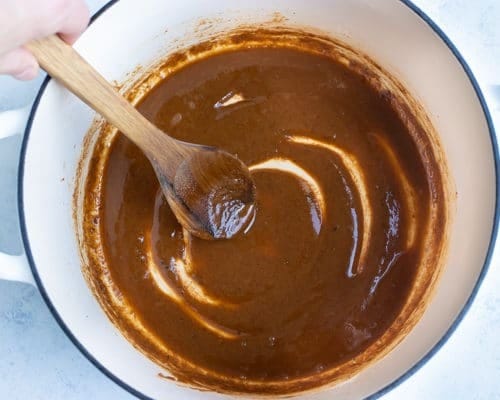
A Rich Well Browned Roux
What Exactly is a Roux?
Imagine a paste that can magically thicken sauces and stews. That's your roux. It's just flour cooked in fat, and as simple as it sounds, it's transformative. When heated, the proteins in the flour expand, evenly dispersing through the liquid, creating a smooth, even texture without that raw flour taste. And the flavor? It develops a nutty depth that's just irresistible.
The Basic Steps to a Perfect Roux:
Choose Your Fat: Butter is a classic, but don't shy away from olive or vegetable oil, or even rendered animal fats for different flavor profiles.
Melt and Mix: Start by melting your chosen fat in a heavy-bottomed pan over medium heat. Once melted, whisk in an equal amount of flour. Remember, patience is key here. A 1:1 ratio of flour to fat generally works best.
Stir, Stir, Stir: Constant whisking is crucial. The roux will thicken, change color, and emit a warm, nutty aroma. This is where it transforms. Keep that arm moving to prevent burning.
Cook to Color: Whether you’re aiming for a white, blonde, or brown roux, each has its unique use and flavor. The longer you cook, the darker and more flavorful it becomes. But remember, the lighter the roux, the stronger its thickening power.
Integrate into Dishes: Whether added to a stew or combined with milk for a bechamel, a roux can elevate any dish. For a cheesy twist, stir in some cheddar or Gruyère.
Types of Roux:
White Roux: Light and subtle, perfect for creamy sauces.
Blonde Roux: A bit darker, with a hint of a nutty aroma, great for soups and gravies.
Brown Roux: The most flavorful, with a deep color and rich taste, essential in Creole and Cajun cooking.
Remember:
The process of making a roux is filled with variables – the type of fat, the heat, even the way you stir. But the core element is patience. Take it slow, keep stirring, and watch as this simple mixture transforms your cooking.
Roux in Action:
From a basic béchamel to the foundation of Alton Brown's Shrimp Gumbo or a hearty Lasagna Bolognese, a roux is versatile. It can thicken stovetop mac and cheese or add depth to a vegetable curry. Once you get the hang of it, the possibilities are endless!
Skill #2: Blanching
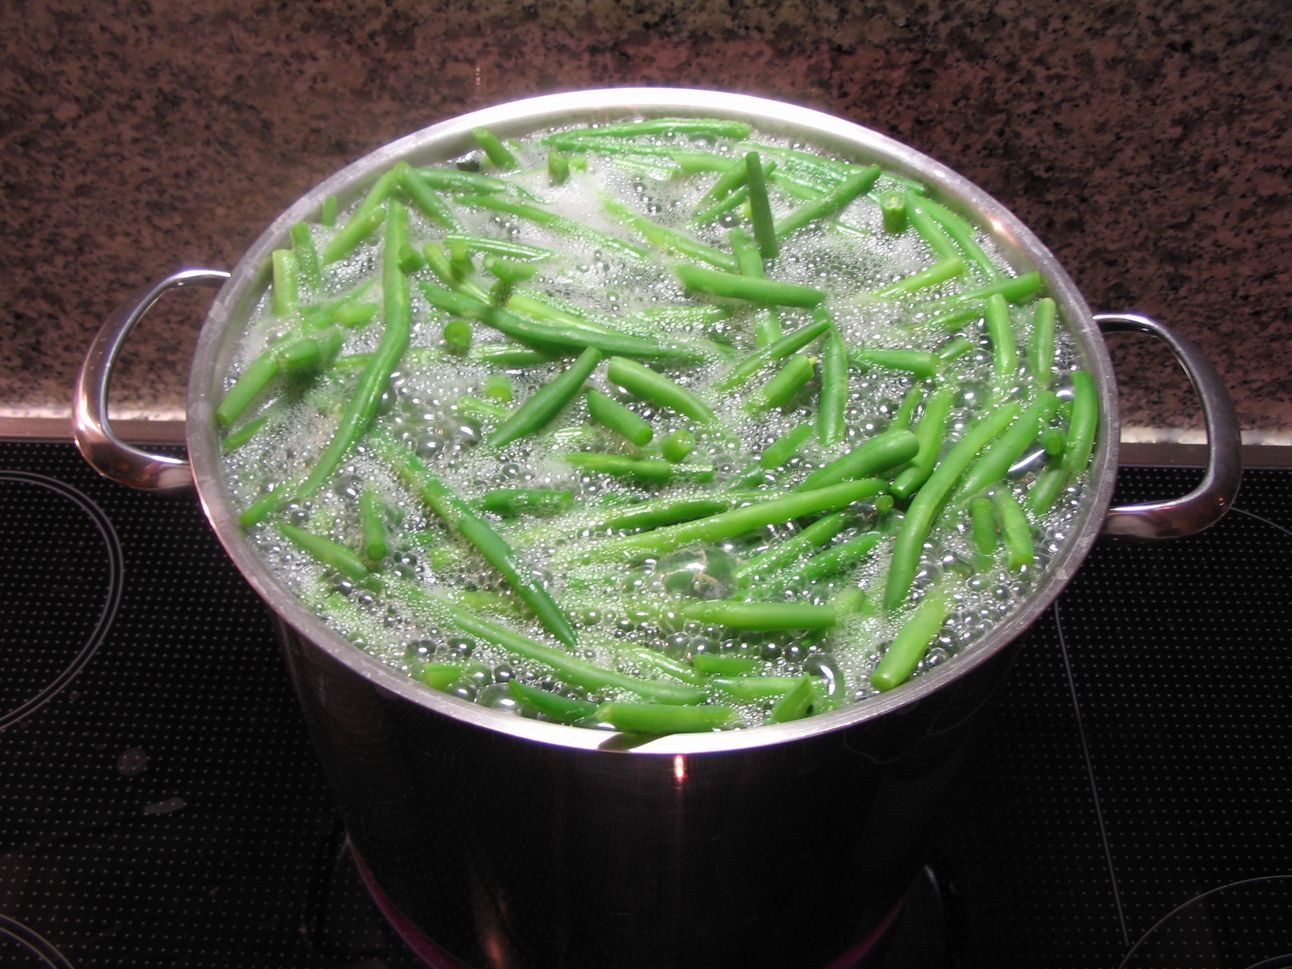
Giving green beans a quick scalding bath
What Is Blanching?
Blanching is a culinary process where fruits and vegetables are briefly submerged in boiling water and then immediately cooled down to stop further cooking. This brief encounter with boiling water does wonders – it deactivates enzymes that can deteriorate flavor, color, and texture, allowing the produce to be stored in peak condition. Despite the heat, blanched foods are still considered raw due to the short cooking time.
Why Blanch?
Blanching serves multiple purposes:
Enhances and sets vibrant colors.
Eases peeling of skins.
Prepares foods for freezing, retaining color, texture, and flavor.
Shortens cooking time for later use.
Helps reduce surface pesticides and microbes.
The Blanching Process: A Step-by-Step Guide
Prep Your Veggies: Rinse them thoroughly. Depending on the vegetable, you might need to trim, slice, or break them into florets. Many can be left whole, like green beans or asparagus.
Boil Water & Prep an Ice Bath: Bring a large pot of water to a rolling boil – about 1 gallon per pound of vegetables. Optionally, add salt. Meanwhile, prepare a bowl of very cold water or a mix of water and ice.
Blanching Time: Add your veggies to the boiling water. Here’s a quick guide for common vegetables (time starts when water returns to a boil):
Asparagus: 2 to 4 minutes
Broccoli florets: 2 to 3 minutes
Carrot chunks: 2 to 3 minutes
Cauliflower florets: 2 to 3 minutes
Corn on the cob: 4 minutes
Green beans: 2 to 3 minutes
Okra: 3 to 4 minutes
Snap and snow peas: 2 to 3 minutes
Spinach leaves: 30 seconds
Shock and Dry: Immediately after blanching, transfer the veggies to the ice bath. Swish them around, then let them chill completely. Once cooled, drain and pat them dry.
Blanching Fruits:
Blanching isn’t just for veggies. Fruits like peaches, apricots, and tomatoes can be blanched to loosen their skins. Simply make a small incision, blanch for 30 to 60 seconds, and then shock in ice water. The skin should peel off easily.
In Summary:
Blanching is a simple yet powerful technique that can transform your cooking and food preservation. It’s about more than just cooking – it’s about enhancing and preserving the natural beauty and quality of your produce.
Skill #3: Pickling
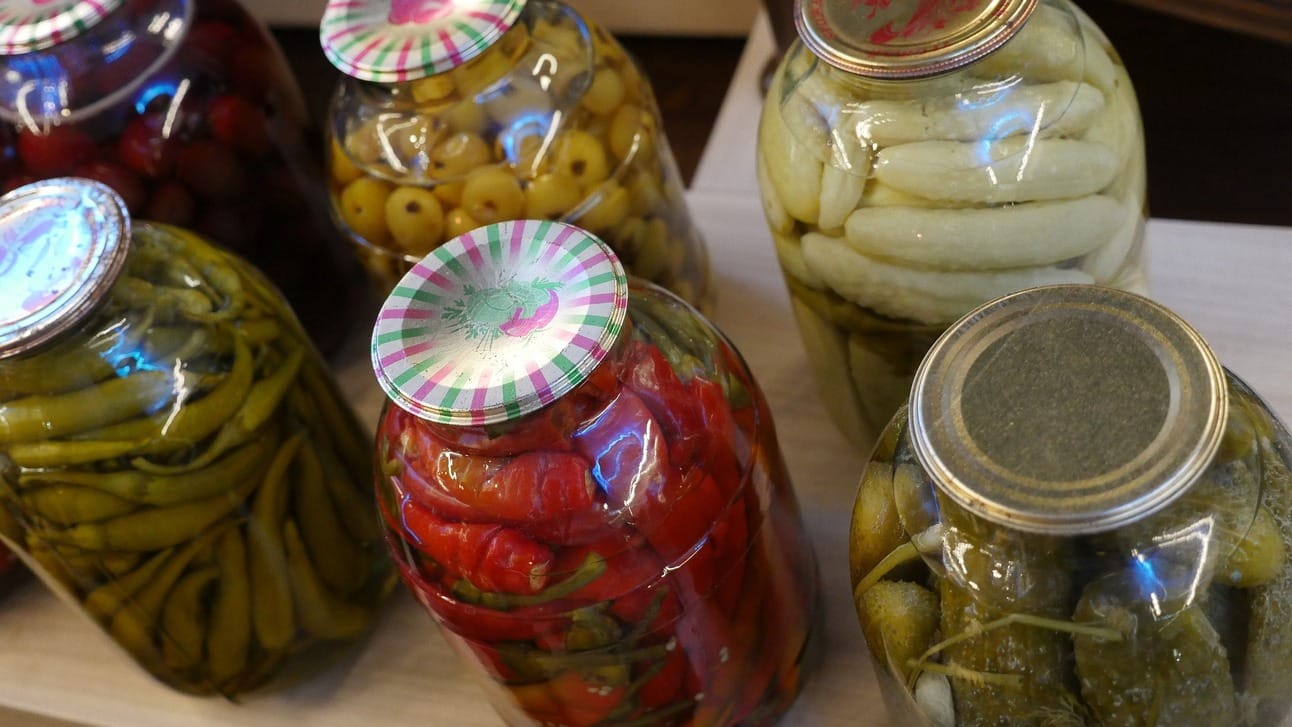
A variety of pickled goodies
Pickling is more than just a method of food preservation; it's a culinary tradition that spans cultures and centuries. Whether you're a novice or a seasoned pickler, understanding the process can open up a world of flavors. Here’s a basic recipe to show you the ropes on how you can start pickling at home:
The Versatility of Pickles
Homemade pickles aren't just delicious; they're a canvas for creativity. Season them with anything from classic dill and garlic to adventurous spices like cumin or turmeric. Whether you prefer them sweet or sour, the beauty of homemade pickles is in their customization.
Classic Refrigerator Dill Pickles Recipe
Ingredients:
1 pound fresh cucumbers (best to use small to medium-sized)
2 cups distilled white vinegar
2 cups water
2 tablespoons sea salt (or pickling salt)
4 teaspoons sugar
4 garlic cloves, peeled and crushed
2 teaspoons dill seeds (or 4 sprigs of fresh dill)
1 teaspoon mustard seeds
1/2 teaspoon black peppercorns
Optional: 1-2 small dried chili peppers for extra spice
Instructions:
Prepare the Cucumbers: Wash them thoroughly and slice into discs, spears, or leave whole.
Sterilize the Jars: Sterilize two pint-sized canning jars by boiling them in water for 10 minutes.
Flavor the Jars: Distribute the garlic, dill seeds, mustard seeds, black peppercorns, and optional chili peppers evenly among the jars.
Pack the Jars: Tightly pack the cucumbers into the jars, leaving about a 1/2 inch of space at the top.
Make the Brine: In a saucepan, mix the vinegar, water, sea salt, and sugar. Bring to a boil, stirring until the salt and sugar dissolve.
Add Brine to Jars: Pour the hot brine over the cucumbers, ensuring they're completely covered, and leave 1/2 inch of space at the top.
Seal and Cool: Tighten the lids and let the jars cool to room temperature, then refrigerate.
Wait for the Magic: Let them sit for at least 24 hours before enjoying. They'll keep in the fridge for many years if done correctly.
Beyond Cucumbers: The Pickling Panorama
The beauty of pickling is its versatility. Here are some other delicious options to try:
Tomatillos: Great for adding a zesty flavor to Mexican dishes.
Carrots: Slice into sticks for a sweet, crunchy treat.
Beets: Their earthiness is beautifully offset by the tang of the vinegar.
Cauliflower: Break into florets for a bite-sized snack.
Peppers: From sweet to spicy, they add a kick to any meal.
Onions: Perfect for adding a tangy crunch to burgers and sandwiches.
The options are endless! Each type of produce will bring its unique flavor and texture to your pickling experiments.
Closing Thoughts
Pickling is more than just a way to preserve food – it's a journey into a world of flavors. We hope this guide inspires you to try your hand at this age-old technique and explore the many possibilities it offers. Happy pickling!
Skill #4: Making a Marinade
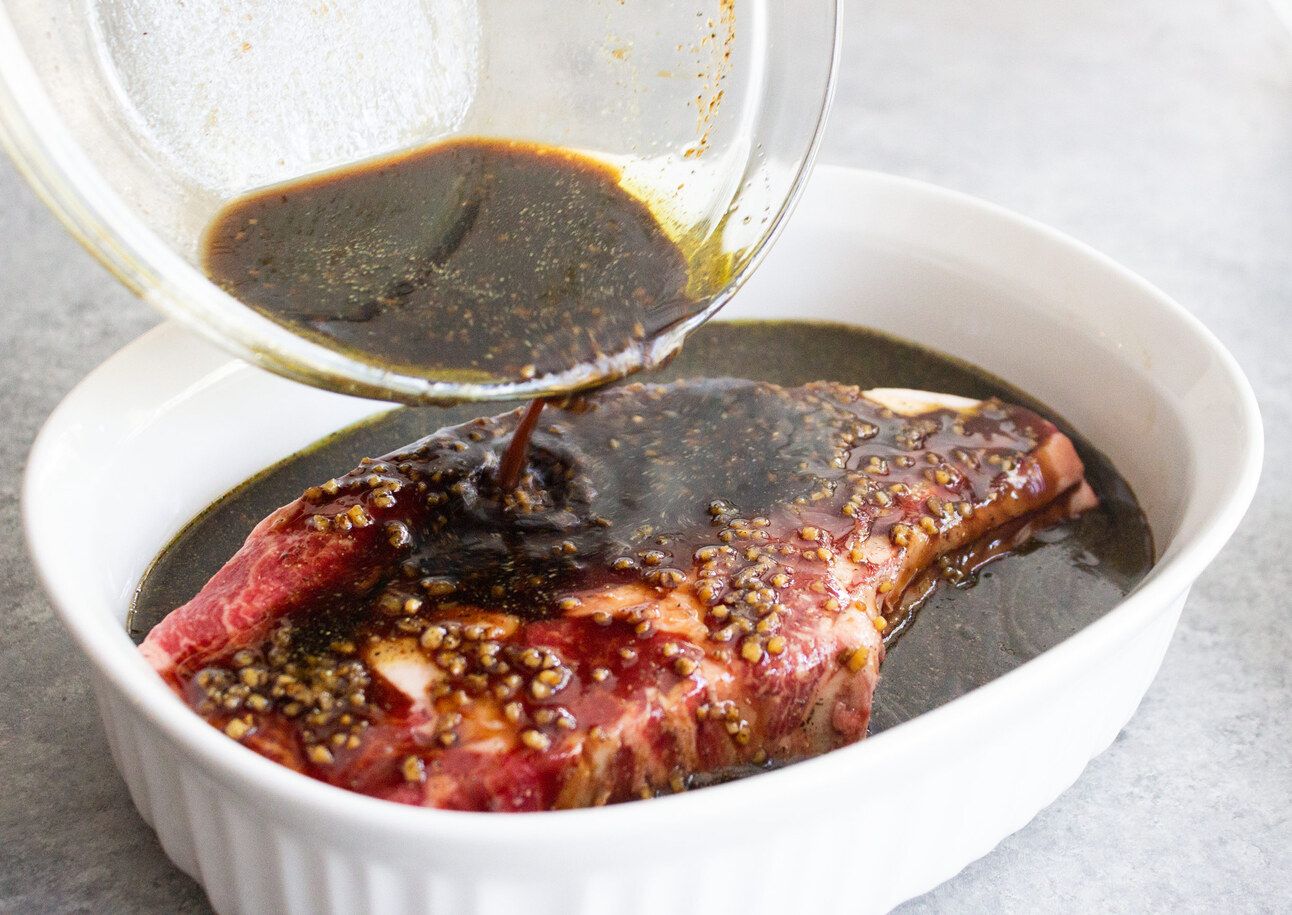
Soaking beef in a flavor packed dark marinade
Far from being just another kitchen trick, marinating is an art that can significantly enhance the flavor, texture, and overall quality of your food. Let's dive into how you can master this technique and bid farewell to store-bought marinades for good.
What Makes a Marinade Special?
At its core, a marinade is a seasoned liquid used to soak meats and vegetables before cooking. This mixture often includes an acid (like vinegar or citrus juice) or an enzyme (from fruits like mango, papaya, or kiwi) that works to tenderize the surface and infuse flavors.
The Balance of a Successful Marinade
A great marinade strikes the right balance of acid, oil, and seasonings. Too much acid can make the food tough and dry, so moderation is key. The perfect mix will flavor the surface and allow some elements, like salt, to penetrate deeper for an enhanced taste experience.
Marinade Components:
Fat: Essential for transferring fat-soluble flavors and retaining moisture. Use olive oil, sesame oil, yogurt, buttermilk, tahini, or mayonnaise.
Salt: Helps flavors penetrate the meat and retain moisture. Use sea salt, soy sauce, or fish sauce for this purpose.
Acid: Weakens surface proteins and boosts flavors. Choose from citrus juice, vinegar, or buttermilk.
Enzymes: Papain or fresh fruits like papaya help break down connective tissues on the surface.
Seasonings and Herbs: Add flavor with ingredients like chili powder, garlic, Worcestershire sauce, or fresh herbs like thyme or basil.
Sugar: Sweeteners like honey or molasses add complexity and can aid in caramelization during cooking.
Benefits of Marinating:
Flavor Boost: Create custom marinades to suit any cuisine, adding your choice of spice, smoke, or sweetness.
Improved Texture: Marinades can soften lean meats and make tougher cuts more tender.
Increased Moisture: Similar to brining, marinades help keep meats juicy during cooking.
Health Advantages:
Homemade marinades let you control the ingredients, avoiding preservatives or excess calories found in store-bought versions. They also help reduce harmful compounds from high-heat cooking.
Marinating Tips:
Time Matters: Over-marinating can lead to tough, dry textures. Pay attention to marinating times, especially for delicate meats like seafood.
Balance Acid Levels: Finding the right balance between oil, sugar, acid, and salt is critical to avoid toughening the meat.
Be Careful with Sugar: Sweet marinades can burn easily, so watch your food closely during cooking.
Safety in Marinating:
Always marinate in the refrigerator to prevent bacterial growth and avoid reusing marinades that have been in contact with raw meat.
Marinating Times:
Seafood: 30 minutes to an hour
Chicken: Up to two days, depending on the recipe
Beef and Pork: Up to 24 hours for tougher cuts
Tofu and Vegetables: Up to 24 hours for tofu, up to 30 minutes for firm vegetables
Try It Yourself!
Simple Citrus-Herb Marinade
Ingredients:
1/2 cup olive oil
1/4 cup freshly squeezed lemon juice
2 tablespoons orange juice
3 garlic cloves, minced
2 tablespoons fresh rosemary, finely chopped
1 tablespoon fresh thyme, finely chopped
1 teaspoon honey (optional, for a touch of sweetness)
1 teaspoon salt
1/2 teaspoon freshly ground black pepper
Remember, marinating is a simple way to take your cooking from good to great, so experiment and enjoy the process!
Skill #5: Making a Great Stock
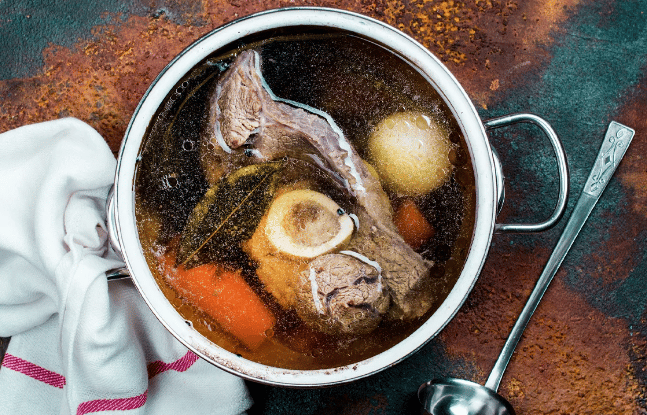
A beef stock being born, full of bones, spices and veggies
Crafting the Perfect Homemade Stock for Soups
In the world of cooking, nothing quite matches the comfort and aroma of a homemade soup. And the secret to elevating your soup from good to exceptional lies in a high-quality homemade stock. While store-bought stocks are convenient and can be satisfactory, taking the time to make your own stock can immensely improve the flavor of your soups and other dishes.
Types of Stock:
The most useful stocks to make at home are chicken, beef, fish, and vegetable stock. It's practical to prepare them in large batches, as they freeze well and are great to have on hand. A good rule of thumb for stock proportions is 100% water, 50% bones, and 10% vegetables. For example, for 6 liters of water, you would use about 3 kg of bones and 600 g of vegetables. Note: Fish stock, which cooks quickly, requires less water and only half the amount of vegetables, often with a cup of white wine for added flavor.
Stock Essentials:
Bones or Vegetables: For a flavorful base, use bones (chicken, beef, or fish) or a variety of vegetables for a vegetarian stock.
Aromatic Vegetables: Typically, this includes onions, carrots, and celery in a ratio of two parts onion to one part each of celery and carrot.
Herbs and Spices: Season your stock with whole herbs and spices like thyme, bay leaves, peppercorns, parsley, and optionally garlic. Avoid salting your stock; it should be seasoned during the final dish preparation.
Making Chicken and Beef Stock:
Start by covering the bones with cold water and bring to a boil. Reduce to a simmer and skim off any residue.
Add chopped vegetables and seasonings.
Maintain a low simmer and skim as needed, adding water to keep the bones covered.
After cooking, let the stock cool, strain it, and refrigerate to solidify the fat, making it easy to remove.
Tips for a Richer Stock:
Cut Bones Smaller: Smaller bone pieces help extract more flavor and gelatin.
Vegetable Size: Match the vegetable size to the stock’s cooking time to extract flavor without turning them mushy.
Beef Stock: Cook for 6 to 8 hours; vegetables can be whole or halved.
Chicken Stock: Cook for 3 to 4 hours; chop vegetables into 2-inch pieces.
Vegetable Stock Making:
Choose Neutral Vegetables: For a versatile flavor, use onions, celery, and carrots. Avoid strongly flavored or starchy vegetables like potatoes, fennel, or beets.
Cooking Time: Vegetable stock typically simmers for about 45 minutes.
Extra Tips to Enhance Your Soup Broth:
Herbs and Spices: Fresh basil for tomato-based soups or parsley for a fresh touch.
Acidic Ingredients: Lemon juice for chicken broth or vinegar for beef broths.
Umami Boosters: Roasted onions, tomato paste, mushrooms, soy sauce, or miso.
Roasting Ingredients: Roasting meat, bones, and vegetables before adding them to the pot deepens the flavor.
Final Touches for a Flavorful Broth:
Concentrate Flavors: Reduce the broth by cooking longer, letting the steam escape.
Skim Excess Fat: Remove the fat layer for a cleaner taste.
With these tips and techniques, you can transform your homemade soups into culinary delights, bringing both nourishment and warmth to your table.
Hope You Learned Something
Cooking is like going on a fun adventure where you can be creative and show your love through the delicious food you make. Learning these cooking skills opens up a whole world of fun in the kitchen. You can make a warm bowl of soup on a cold night, a colorful and tasty dish with a special sauce, or even crunchy pickles that you made yourself. Every dish you make is a part of your cooking adventure.
We hope these cooking tips and tricks make you excited to try new things, change recipes a little, and make your cooking the best it can be. Every meal can be special. These cooking tricks are like secret tools to make your everyday food really amazing.
Thanks for being a part of our tasty journey here at The Tastebud. Keep discovering new things, keep cooking, and most importantly, enjoy every bite of what you make!

